
Villargent | |
|---|---|
 The town hall in Villargent | |
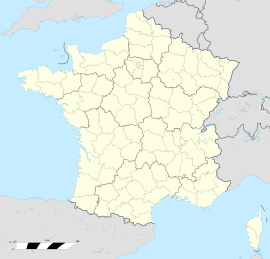
Location of Villargent  | |
 Villargent  Villargent | |
| Coordinates: 47°32′32″N 6°29′11″E / 47.5422°N 6.4864°E | |
| Country | France |
| Region | Bourgogne-Franche-Comté |
| Department | Haute-Saône |
| Arrondissement | Lure |
| Canton | Villersexel |
| Area 1 | 2.86 km2 (1.10 sq mi) |
| Population (2021)[1] | 114 |
| • Density | 40/km2 (100/sq mi) |
| Time zone | UTC+01:00 (CET) |
| • Summer (DST) | UTC+02:00 (CEST) |
| INSEE/Postal code | 70553 /70110 |
| Elevation | 274–300 m (899–984 ft) |
| 1 French Land Register data, which excludes lakes, ponds, glaciers > 1 km2 (0.386 sq mi or 247 acres) and river estuaries. | |
Villargent is a commune in the Haute-Saône department in the region of Bourgogne-Franche-Comté in eastern France.
YouTube Encyclopedic
-
1/3Views:6 898 0482 026452
-
Super Easy First Guitar Lesson - Guitar Lessons For Beginners - Stage 1 - The D Chord
-
RC CAT 365C 1:14
-
The Cornish Explorer..58021..29/06/02
Transcription
OK, here we are for our look at our first chord. This is it. This is D. And this is the first chord that we are going to be learning in this little course. Whenever we learn a new chord we are always going to do it one finger at a time and we are always going to start with our first finger then the second finger then the third finger and the fourth finger if we need it. So, what I want you to do is have a look at that neck diagram and we are looking for where the first finger goes. Now the first finger, you will see, is there on the third string. We start from the thinnest string, so one, two, three. Third string. And it is on the second fret. So the double lines on the neck diagram, that is the nut there. This would be the first fret, this would be the second fret. So, the first finger, the correct position is right here where you are watching it right now. Now make sure as well that you remember that the finger needs to be quite close to the fret not right back here. That would be bad. Up fairly close to the fret. Not on top of it. That would be bad too. So just back here a little bit. So that is the first finger out of the way. Also remembering that we are using the tip of our finger. Don't try and put your finger down too flat. You are really thinking just on the tips of your fingers there is the bit that should be holding the strings down. If we look at the second finger you will notice that one is on the same fret as the first finger but on the thinnest string. So it is kind of going underneath. And again, making sure that you are using the tip of your finger there. That one shouldn't be too hard to put down. The last one, third finger. Now third finger is going on the third fret of the second string. So the string in between the ones which the other two fingers are on. A good way of helping you remember this as well is that it kind of looks like a D if you look at the shape of the notes. It kind of looks like a D. That might help. The thing that you might find now is that the third finger is falling right back here at the back of the fret. Really we want to get that third finger right up as close to the fret as we can. This is something that will take a little bit of practice. If it is hard right now and it is stuck down there just keep trying to push it forward. Even if you have to get your other hand to stretch it up that is OK. But try and get used to that stretch and try and get your fingers in a really good position right from the beginning. Now what is really important when you are doing your chords is that you check that every note in the chord sounds really good. That is the way that you make sure that your chord sounds great right from the beginning and you won't develop any bad habits. So if you have a look at that neck diagram again you will see that the thickest two strings have both got an "x" at the top which means that we don't play them. So the first note that we are going to be picking is the fourth string. Generally what I say to people is to do a strum or to pick out a strum. So starting from the fourth string, that is the third thickest string, we do a strum first. . . And if you are doing really well it will sound like that. If you are not doing so well it might sound like this . . . Something like that. So what we are going to do now is we are going to try and tailor the chord and make sure that every note is sounding good. I am going to show you where some of the problem areas are for a lot of people. The first thing . . . The fourth string. If that one is not ringing out very clearly then probably the tip of your first finger is touching that string. So make sure that you bring your first finger down just a little bit so you get a nice, clear fourth string. Now we are on to the third string which is the one which has got our first finger on it . . . That one should sound nice and clear there . . . And if that one is not working, like not a nice, clear note, there are a couple of things that could be the culprit. Most likely your third finger is up too high and is touching that third string. . . So you just have to move that third finger down a little bit . . . And you should get that string ringing nicely. If it is buzzing a little bit . . . Like that, probably your first finger is back a bit too far. So make sure that it is right up nice and close to the fret . . . Now we are onto this note here which is the second string with the third finger . . . Most people don't have a problem with that note actually to tell the truth. If it is too buzzy . . . Like that it is because it is too far back from the fret . . . You might find that it sounds like that. If you get it right up next to the fret you will get it sounding nice. The hardest note for most people is this one here with the second finger. The reason that most people find this hard is that the third finger tends to lay down a little bit too flat and mute . . . The thinnest string. So a lot of people get this as their first D chord . . . And the reason is simply here the underneath the third finger is touching the thinnest string. So you have got to arch those around a little bit . . . Make sure they are right on the tips and that will allow that string here to ring out nice and clearly . . . Now, it is definitely worth spending a little bit of time now on getting your D chord so that it is sounding really cool. Doing exactly what I just showed you there. A strum . . . Pick out the notes one at a time and then adjust your fingers to make sure that each one sounds good. So it might go . . . And then when you have got it and you know they are all good . . . Strum it again at the end. It is really important that you go through this process lots and lots of times to make sure that your D chord sounds really cool. Before we go on and learn any more chords, stop the tape, have a little bit of a play around with your D chord and try and get it to sound really sweet. Actually, just a couple of things that I forgot to mention. The first one is thumb position. It is quite common for some people, including me, to play with their thumb sitting over the top of the guitar. That is fine when you can play. But when you are starting off as a beginner you are much better off having the thumb around the back of the guitar. And the reason for this is because it is really helpful for when you are learning to play barre chords later on. If you have done no practice at all with the thumb round the back you will find this muscle here is going to be really weak. When you are gripping your chords like that you are developing this muscle which is really going to help you with your barre chords and your power chords later on. So when you first start off it is definitely important that you try and keep that thumb behind. It is also important to you leave a little bit of a gap at the bottom of the guitar neck here. The thing that I often say to my students is that you should imagine that there is an electric cable running down the bottom of your guitar neck and that you are not allowed to touch it. That is a really good way of thinking about it because what you don't want is your first finger leaning up on the side of the guitar neck. Again, later on that can be a really good thing. But just in these early stages you want to make sure there is a little bit of space under here, between the neck and your hand. Generally the palm of your hand, the flat of your hand, this part, should not be touching the guitar neck. So the parts that should be touching the guitar neck are your thumb, the pad of your thumb here and the ends of your fingers and that is all. Later on that is going to change. That is not the way you would play guitar forever but when you are starting it is a really good idea to follow that bit of advice and I will talk about it a little bit later on in this course where I will explain to you when it is a good idea to do those thing and when it is not. For now, stop tape, practice your D chord. Make sure that you get every note really nice and clear, and then we are up for learning another chord.
See also
References
- ^ "Populations légales 2021". The National Institute of Statistics and Economic Studies. 28 December 2023.
| Authority control databases: National |
|---|
This Haute-Saône geographical article is a stub. You can help Wikipedia by expanding it. |